![How Do I See Different Years in Google Earth on iPhone? [Find Out]](https://gearthhacks.com/wp-content/uploads/2023/01/images-7-1.jpg)
![How Do I See Different Years in Google Earth on iPhone? [Find Out]](https://gearthhacks.com/wp-content/uploads/2023/01/images-7-1.jpg.webp)
Whether you’re a history buff, a real estate agent, or just someone who’s curious about the world around you, this feature is sure to be of interest to you.
In this post, we’ll be discussing one of the most interesting and unique features of the Google Earth app for iPhone – the ability to view different years of satellite imagery. This feature, known as historical imagery, allows users to travel back in time and see how a specific location has changed over the years.
By the end of this post, you’ll be able to use Google Earth to view different years of satellite imagery and discover the rich history of any location on earth. So, let’s dive in and discover the world around us in a whole new way!
Understanding Google Earth

Google Earth is a virtual globe, map, and geographical information program that was originally developed by Keyhole, Inc. in 2001. It was then acquired by Google in 2004 and has since become one of the most popular and widely-used mapping and exploration tools in the world.
With Google Earth, users can view the entire Earth in 3D, as well as explore specific locations, landmarks, and natural features with incredible detail and precision.
One of the key features of Google Earth is its ability to display satellite imagery, aerial photography, and even street maps in a seamless and interactive way. Users can zoom in and out, pan around, and even tilt the view to get a better perspective on the area they are exploring.
Google Earth also includes a variety of different layers that allow users to view different types of information, such as roads, borders, buildings, and more.
In addition to its mapping capabilities, Google Earth also includes a variety of other features and tools that make it a powerful tool for research, education, and personal curiosity. For example, users can search for specific locations and landmarks, measure distances, and even create their own custom maps and tours.
Google Earth also includes a variety of educational resources, such as guided tours and interactive activities, that make it a great tool for learning about the world.
Setting up Google Earth on iPhone


Google Earth is a powerful tool that allows you to explore the world from the comfort of your own home. With Google Earth, you can explore different cities, landmarks, and natural wonders in 3D, and even take virtual tours of popular tourist destinations.
The app is available for both Android and iOS devices, including the iPhone.
Download the App
The first step to setting up Google Earth on your iPhone is to download the app from the App Store.
- Search for “Google Earth” in the App Store
- Tap the “Get” button to download the app
- Once the download is complete, open the app to begin the setup process.
Sign in With Your Google Account
Google Earth requires you to sign in with your Google account in order to access all of its features. If you already have a Google account, simply enter your email and password to sign in.
If you don’t have a Google account, you can create one by tapping the “Create account” button.
Explore the World
Once you have signed in, you can start exploring the world with Google Earth. You can navigate to different locations by simply typing in the address or name of the location in the search bar at the top of the screen.
You can also use the zoom and pan controls to move around the map.
Customize Your Settings
Google Earth allows you to customize various settings to suit your preferences. You can change the map style, adjust the 3D terrain, and even set up notifications for new locations.
To access the settings menu, tap the three horizontal lines in the top left corner of the screen and then tap the “Settings” button.
Viewing Different Years on Google Earth
| Step | Description |
| 1 | Download and install Google Earth on your iPhone |
| 2 | Open the app and log in to your Google account |
| 3 | Tap the three horizontal lines in the top left corner of the screen |
| 4 | Tap on the “Layers” button |
| 5 | Scroll down to the “Time” section |
| 6 | Use the time slider to select different years |
| 7 | Use the map to explore the historical imagery |
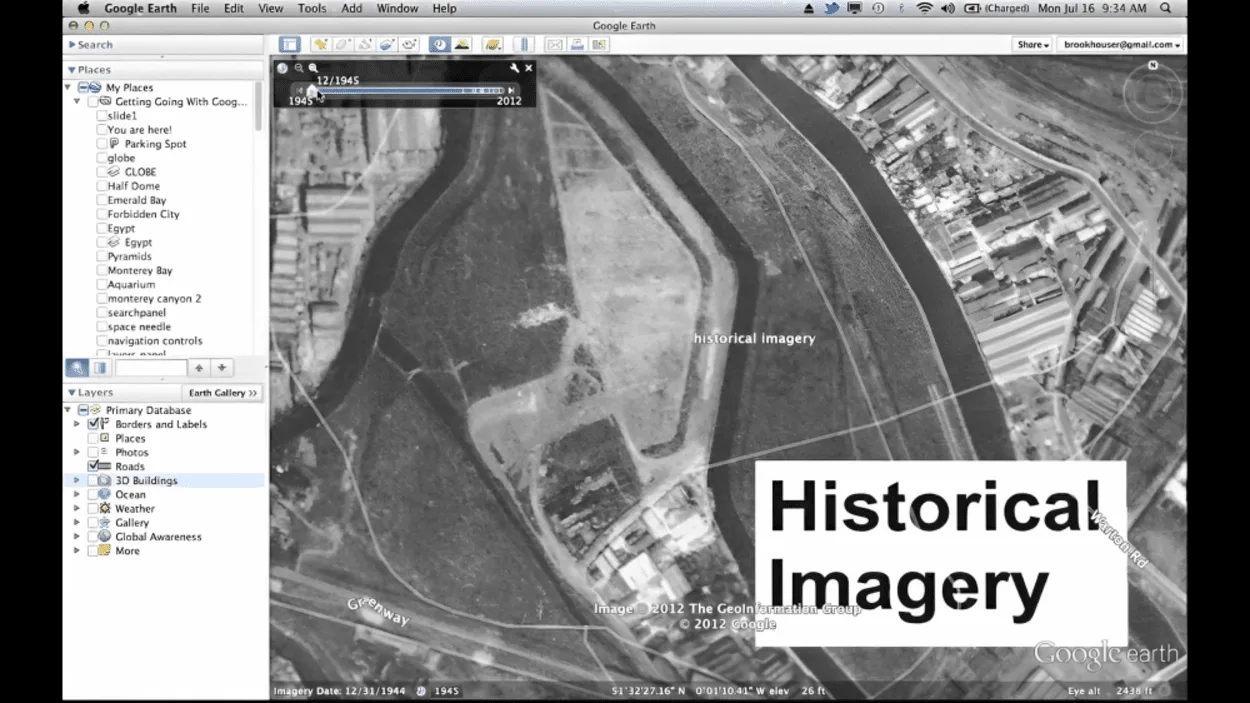
One of the most interesting features of Google Earth is the ability to view different years and see how the world has changed over time.
To view different years in Google Earth, you’ll first need to download and install the program. Once you have Google Earth open, simply click on the “View” menu and select “Historical Imagery.” This will bring up a timeline at the bottom of the screen that allows you to select a specific year or date range to view.
One of the most interesting changes you can see in Google Earth is the growth of cities. For example, if you compare images of New York City from the 1940s to those from the 2010s, you’ll see a dramatic increase in the number of buildings and skyscrapers. This is a clear indication of the rapid urbanization that has occurred in many parts of the world.
Another interesting change to observe is the impact of human activity on the environment. For instance, you can compare images of the Amazon rainforest from the 1980s to those from the 2010s and see the clear-cutting of the forest for agriculture and other human uses.
Navigating Google Earth on iPhone
Navigating Google Earth on iPhone is a fairly straightforward process, but there are a few tips and tricks you should know to make the most of the app.
First, it’s important to understand the basic layout of the app. At the bottom of the screen, you’ll see four buttons: “Explore,” “For You,” “Saved,” and “Contribute.”
“Explore” is where you’ll find the main map view and access to different layers, such as satellite imagery, 3D buildings, and more.
“For You” is where you’ll find curated content and suggested places to explore.
“Saved” is where you can access any places or collections you’ve saved for later.
“Contribute” is where you can share your own content and contribute to the Google Earth community.
To move around the map, you can simply swipe and pinch to zoom in and out. You can also use two fingers to rotate the map and tilt it to see 3D buildings. If you want to jump to a specific location, you can search for it using the search bar at the top of the screen.
Another useful feature is the “Layers” button, which can be found by tapping the three horizontal lines in the top left corner of the screen. Here, you can access different layers of information, such as satellite imagery, 3D buildings, and more.
FAQs
How Do I Access Historical Imagery in Google Earth on iPhone?
To access historical imagery in Google Earth on your iPhone, you first need to open the app and log in to your Google account.
Then, tap the three horizontal lines in the top left corner of the screen, and select “Layers”. In the “Layers” menu, scroll down to the “Time” section and use the time slider to select the year you want to view. You can then use the map to explore the historical imagery.
Can I View Different Years for a Specific Location in Google Earth on iPhone?
Yes, you can view different years for a specific location in Google Earth on your iPhone.
Once you’ve accessed the historical imagery using the time slider, you can zoom in on a specific location and view its historical imagery for the selected year.
Is it Possible to Compare Different Years for the Same Location in Google Earth on iPhone?
Yes, it’s possible to compare different years for the same location in Google Earth on iPhone. You can use the time slider to select different years, and then use the map to explore the historical imagery for each selected year.
Additionally, you can use the “Measurement” tool to compare the changes in the location over time.
Conclusion
- In conclusion, viewing different years in Google Earth on iPhone is a great way to explore historical changes and study historical events.
- By using the time slider feature, you can easily access and view historical imagery of different locations, giving you a unique perspective on how places have changed over time.
- Whether you’re researching a historical event, studying the development of a city, or simply exploring for fun, Google Earth on iPhone is a powerful tool that can help you better understand the world around us.
- With the tips and tricks outlined in this post, you should now have a good understanding of how to navigate and use Google Earth on your iPhone to its full potential.
Related Articles
- How Do I Change the Date in Google Earth? [Steps]
- How Old Are the Images on Google Earth?[Revealed]
- Is Zoom Earth Better Than Google Earth?[Comparison]